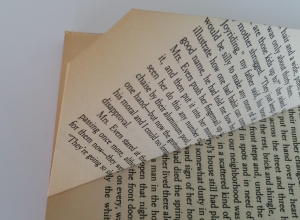
After I was introduced to the Art of Book folding (was it only a couple of months ago?) I did a little research, mainly to get ideas and inspiration for our Saturday crafty aftys, and came across paperback book folding.
If you google this or search on pinterest you will find plenty of finished work – most of it on Etsy and selling for silly money, but not a great deal on the actual “how toos” . There are some blog posts with the basic instructions but the main thing I struggled with was finding the number of pages you need to complete the different projects so I decided to do my own practical research, which is why I have been rather quiet just lately, lol.
A “few” folded books later I think I have it nearly sussed so, after raiding a local charity shop for paper backs, it was time for the group have a go too.
1 This is the one we are starting with
Now this is really easy, so grab yourself a paperback or two (preferably ones destined for the charity shop and not the one the “other half” is in the middle of reading) and just follow me
You will need a book with approx 200 pages (need at least 180) and just make sure that the spine is good, you dont want one with the pages falling out.
Take your book and tear off the outer cover , but make sure you keep the spine intact.
with the spine of the book away from you take the bottom right corner of the top page and fold up to the spine.
Take the folded edge of the page you have just folded and fold that edge up to the spine.
You should have a point overhanging at the left side. Press down on the edge of the book to give you a crease line
And then fold at the crease and took the point underneath.
That is your first page folded and all you have to do now is folding all the rest of the pages the same way.
You just need to make sure you keep folding right up to the spine. This does get quite difficult towards the end. The ladies found this to be the case,
but don’t worry too much, once you have finished you can go back to any that really stand out and re fold in tighter in. These are going to be decorated as Christmas trees but by changing a few of the folds they can also be turned into angels ( will blog this next time)
2 By changing the folds you get different shapes
For this one you start the same way as before, thought you will need aprrox 350-400 pages for this one. The more pages the more dense the finished shape.
fold bottom right corner to spine
 Then bottom left corner to spine and that’s all there is to it.
3 For this one, again approx 350 pages. but you just have think about the folding a little more as you are alternating the folds on the pages.
 Fold bottom right corner to spine as before
For the second page you need to start from the bottom left corner – up to spine, bottom of page up to spine – right corner up to spine
You need to alternate the pages like this to even out the bulk of the folds otherwise it will end up fatter at one side than the other.
I found a tutorial “the bird house”on redhenhome blogspot but I am not sure if it is still live as there have been no posts since December and I cannot find the link to the post now. I will try again and if no success I will do another post with the instructions. It was a bit more challenging but still not difficult to do.
Once they are completed they can be decorated and strung up as decorations or placed together in a group. They can be kept simple or can go to town with tassels, beads, flowers etc. Once we have decorated ours I will do another post to show them finished but for now if we just go back to pattern 3 and change it ever so slightly using approx 160 pages and not doing the 3rd fold you can do this
Paperbacks come in different sizes and especially for the tree cones you could use readers digests, catalogues, directories etc and just by having a play with different folds you can come up with many different shapes. This is just the start…….


Fantastic Julie, sorry I missed this session, love the diamond hanging shape but they all look brilliant x
While I hate the thought of ruining books, this is so amazing!
I know I thought the same at first, so the books I get to do this are from charity shops giving those unloved and unwanted books new new lease of life and giving money for a good cause too. Now I don’t feel so guilty when I rip the cover off 🙂
🙂